Manuals
Instructional video (for basic results)
How-to find results
Instructions how to work with a table (in extended results)
Customization of display of the results table
During the initial load, the results table already shows the data broken down by territory and all available dimensions. However, you can adjust the dimensions in the table to suit your needs.
How to adjust dimensions in the table
-
Click the icon
 (Show side pane) in the upper right corner of the screen. This will open the Data Settings pane on the right side of the screen.
 -
Click on the table.
-
In the Data Settings pane in the Columns section, you can do the following:
- replace the dimension (data item) in the table with another by clicking on the dimension you want to replace
- add another dimension by clicking the + Add button
- change the order of the dimensions in the table by clicking on one of the dimensions and dragging it to the desired position
- remove a dimension using the menu that appears by right-clicking on the dimension
You can also use the same options to adjust the dimensions in the table rows (in the Rows section) or the displayed numeric indicators (in the Measures section). Absolute as well as relative values are available as numerical indicators.
How to sort values in the table
You can sort the values in the table in 2 ways:
- By clicking on the name of the data item in the rows or columns of the table - after the first click, the values are sorted from the smallest or alphabetically the first value, after the second click, they are sorted from the largest or alphabetically last value.
- Right-click in the table to display the options menu, click Sort, and select the data item and sort direction.
Note: some word categories have their own default order of values that goes beyond the alphabetical order.
How to filter dimension values (display a subset of values)
-
In the upper right corner, under Filter the dimensions in the table, click the (select values) button.
-
In the window that appears, click the dimension values that you want to keep displayed in the table. The remaining values will be automatically grouped into the "remaining" category.
-
Click the Close button or just click outside the window. This reduces the data displayed in the table.
Similarly, in the upper left corner in the Select territorial unit section, you can select 1 territorial unit by entering a name (for local administrative units for statistics - LAU) or select several territorial units from the list (for regional territorial units for statistics - NUTS).
What to do if the table does not display anything
You may have created a table that is too large and reached the data limit for table display. Try selecting a smaller range of data to display (fewer territories or fewer dimension values) using the selections and filters on the left and right side above the table (following the procedure in the previous paragraph).
How to restore view to original state
You can use the arrows  in the upper right corner of the screen to undo recent clicks or restart the entire view via the icon
  and the Restore default report state option.
Saving results
Right-click on the table and choose one of the options:
- Save image - saves the image from the current view of the table in .png format
- Export data - allows you to download data from the table in .xlsx, .tsv or .csv format
- Print object - downloads the table to a .pdf format
Instructions for importing CSV into MS Excel
On the website www.scitanie.sk, it is possible to download  every report from „Extended Results“ as well as CSV files. Each such report contains 5 CSV files compressed into a ZIP. If the CSV data in the MS Excel is not correctly displayed, it should be converted to Unicode format (UTF-8).
Manual:
-
Open MS Excel.
-
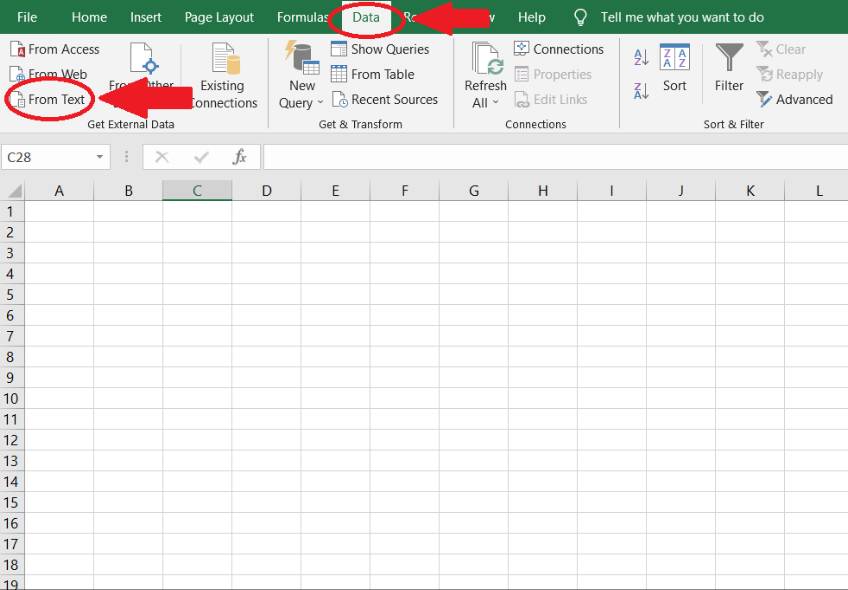
In the upper left corner of the card „Data“ select the option „Get external data” – „From text“.
-
Search in your computer the CSV file you want to open.
-
Open the Text Import Wizard, click:
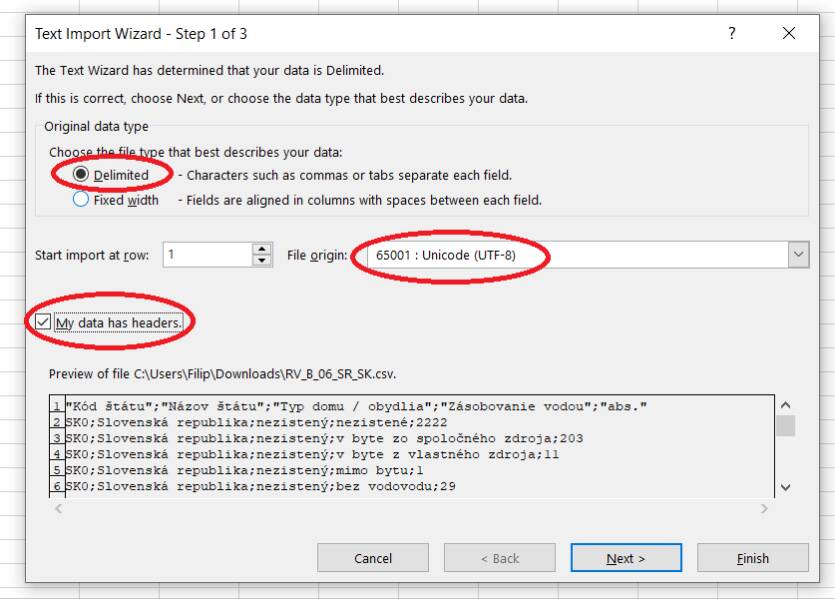
- „Delimited“ (file type)
- „Unicode (UTF-8)“ (file origin)
- „My data has headers“
-
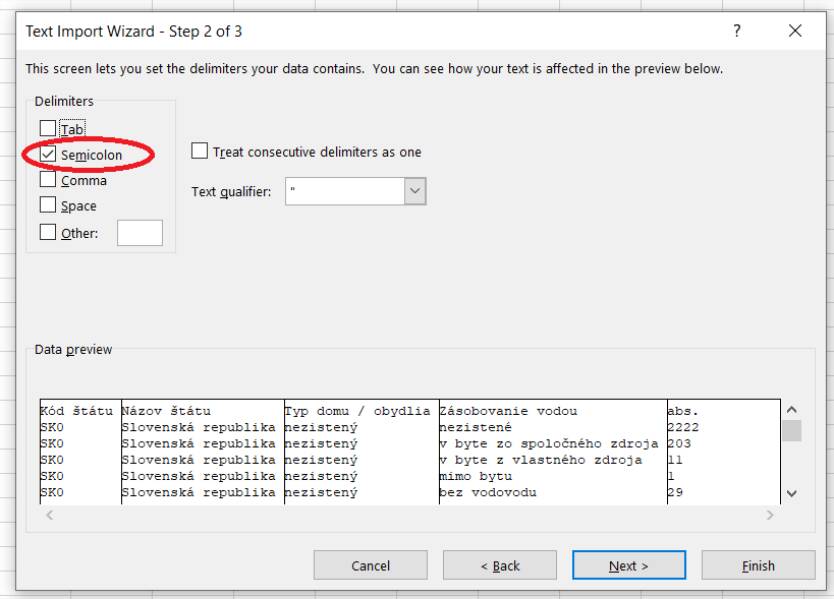
In the next step select the „Semicolon“ as delimiters..
-
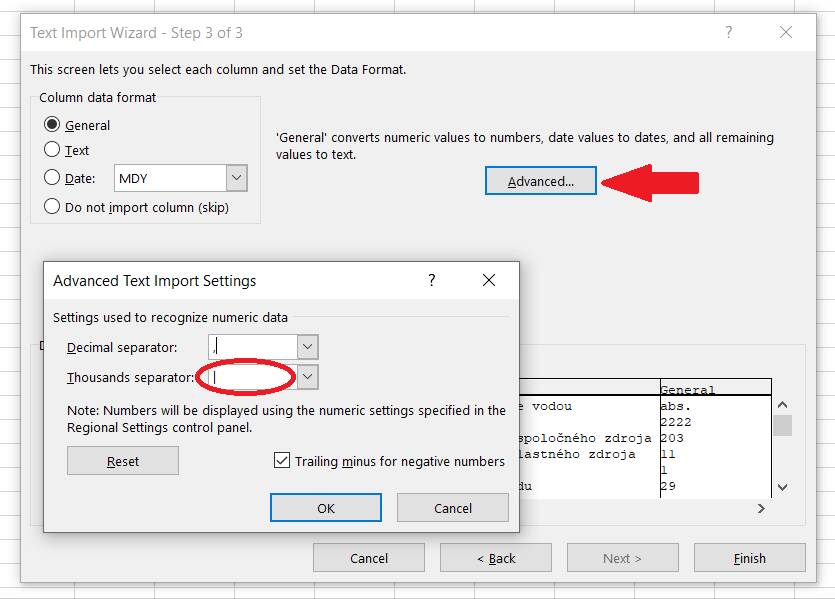
In the option „Advanced“ remove the gap in the „Thousands separator“.
-
In the end, select„OK“ and „Finish“.